Good news for those who always wanted a microtouch but didn’t have the time to build one: they are now available from the nice folks at adafruit. If you get one be sure to use the “rossum” coupon code at checkout for a 10% discount.

This version is powered by the delightful atmega32u4. It features a 320×240 pixel touchscreen, an accelerometer, full speed usb, a microsd card reader and a support for a lithium ion battery.
It has an application framework of sorts and it is possible to run a variety of applications with varying degrees of utility. Possibilites are bounded only by your imagination (and the 8 bit cpu + 2.5k of RAM). Tools support includes a PC simulator and a live sampling profiler. Code at https://github.com/rossumur/microtouch.
Building an App
Create HelloApp.cpp in apps/demos:
#include "Platform.h"

    class HelloState
    {
    public:
        int OnEvent(Event* e)
        {
            switch (e->Type)
            {
                case Event::OpenApp:
                    Graphics.DrawString("hello",110,100,0);
                    break;
                default:
                    ;
            }
            return 0;
        }
    };

    INSTALL_APP(hello,HelloState);
Build, Flash and test. You should get a little app that says ‘hello’ and never quits.
Ok. What is going on here? Microtouch as an application framework of sorts that allows multiple applications to be built into the firmware. An application is ‘installed’ with the INSTALL_APP macro: the first parameter is the name that will appear in the shell, the second defines a c++ object that maintains the applications state.
The framework (Shell.cpp) sends events to the app thorugh the OnEvent method; in this example the app draws “hello” on the OpenApp event which will always be the first event an app will see. The most common events come from the touch screen: TouchDown, TouchMove and TouchUp.
Because there is only 2k of RAM in this device we really don’t have the luxury of things like memory managers. The applications state is all the heap it will ever know; its maximum size is defined by MAX_APP_BUFFER in Platform.h and is set to 768 bytes by default. If the app state is larger thanMAX_APP_BUFFER then the application won’t be visible in the ShellApp.
Lets try a slightly more complicated version:
class HelloState
    {
    public:
        void Draw(int x, int y, int color)
        {
            Graphics.DrawString("Hello",x-10,y-6,color);
        }

        int OnEvent(Event* e)
        {
            switch (e->Type)
            {
                case Event::OpenApp:
                    Draw(120,160,0);
                    break;

                case Event::TouchDown:
                    if (e->Touch->y > 320)
                        return -1;      // Quit

                case Event::TouchMove:
                    Draw(e->Touch->x,e->Touch->y,RandomBits(1));
                    break;
                default:
                    ;
            }
            return 0;
        }
    };

    INSTALL_APP(hello,HelloState);
Now we can scrawl lots of randomly colored hellos over the screen and we can even quit by touching the bottom of the screen. The Graphics.h api is fairly self explanatory: it uses 5:6:5 RGB color and supports circles, rectangles and blitting as well as text.
Stdout is connected to the USB serial port so feel free to use printf for debugging.
Sample Applications


There are a number of example applications that exercise various parts of system. They don’t all fit in the device at the same time. The APPLICATIONS path in the Makefile defines which apps get built into the firmware.
Shell
The shell is the Microtouch equivalent of the Finder or Explorer. It displays a list of installed apps and files found on the microSD card, and is responsible for lauching apps and delegating file opening to the View app. It also has code for a simple serial console:
- ls – list files on microSD if present
- p1/p0 – turn profiling on/off
- lcd – dump lcd registers
- appname – launch appname if installed
Off
The simplest app. It turns the Microtouch off unless it is plugged into USB. The Microtouch will turn itself off after 5 minutes of inactivity so you don’t absolutely need this one, but I find it somehow comforting.
Calibrate
Calibrates touchscreen and stores calibration data in EEPROM. You probably will only need to run this app once if at all. Click in the red circles with a stylus until the application is satisfied with the consistency of the clicks. If you have a shattered touchscreen this app may give up after half a dozen attempts.
View
Displays files with inertial scrolling, currently IM2 files created with the MicrotouchTool are supported.
HWTest
Exercises major hardware components including touchscreen, accelerometer, microSD and backlight.
Accelerate
Accelerometer demo draws XYZ values and bounces a ball depending on the orientation of the device.
View
Displays files with inertial scrolling, currently IM2 files created with the MicrotouchTool are supported.
3D
The classic 3D Microtouch engine with accelerometer support. Tilt the device to move the object, touch the screen to select diffent platonic solids.
Pacman
Omage to the greatest game ever written, demonstrates a technique for flicker free sprites at >60Fps.
Doomed
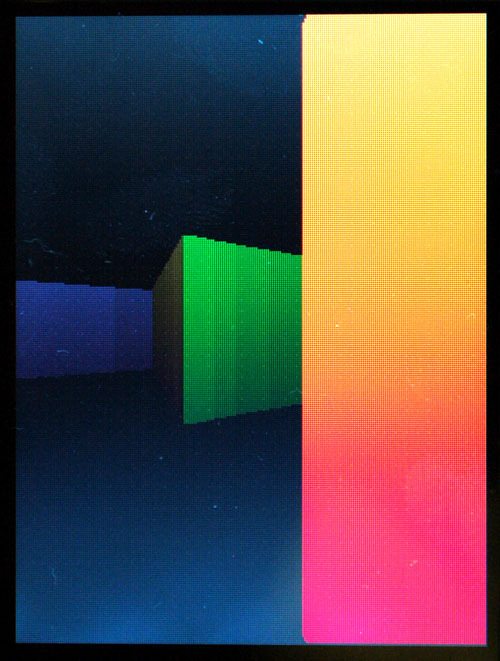
A simple raycasting demo. Touchscreen controls speed and direction of movement. Despite the humble 8 bittyness of the CPU it manages 25fps. Play with it until you find the red wall.
Flip
Try and make all the dots the same color by touching to flip a pattern of 5. I find it bloody hard, I have only managed to complete it once. Could someone please publish a deterministic solution?
Lattice
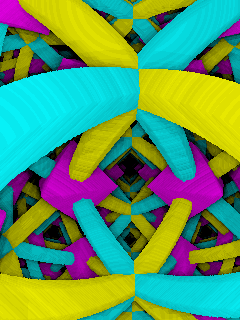
Graphics demo generates a nice infinite mesh. Looks like it is complex 3D engine with lighting, shading and geometry. It isn’t.
Mines
Click. Click. Boom.
Paint
Fingerpainting with touchscreen. Press harder for a bigger brush, select one of three brushes:
- Cycle Chroma
- Cycle Luminance
- Color from accelerometer XYZ
Tools
Microtouch Tool
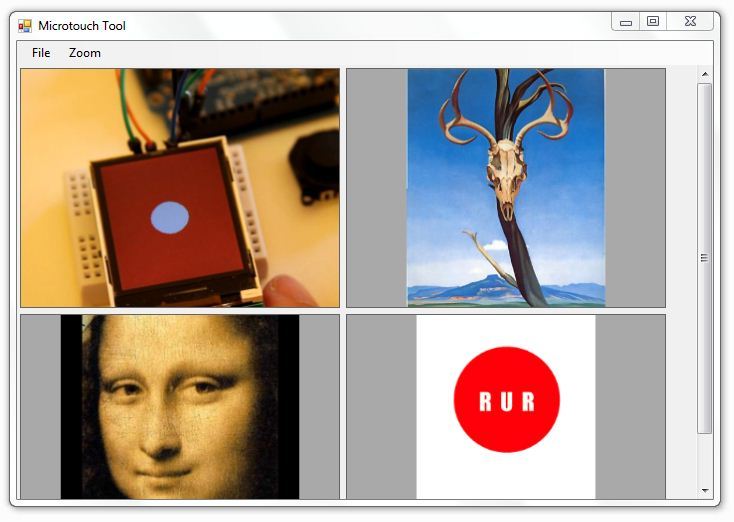
A simple tool to create IM2 slideshow files from jpg,png or other image files. Add as many images as you like, right click to change background, image fit or remove and image. Drag to reorder. when you are satisfied save the image to a microSD card and open from the Microtouch Shell.
Microtouch Profiler

This tool is a GUI for the built-in sampling profiler. To use:
- Connect Microtouch to USB
- Make sure the Shell is running on the Microtouch
- Launch MicrotouchProfiler.exe
- File/Open the .lss listing file that was generated when the .hex file was built
- Launch the target Microtouch app
The left panel displays a list of modules sorted by activity. The right panel shows the .lss file which is a mixture of source and assembly plus red bars hiliting hotspots in the code. Click on a module to move to its start in the lss file.
The built-in profiler works by sampling the PC from a timer ISR and printing it over the USB serial. If you like hexidecimal numbers you can turn the profiler on and off by typing ‘p1’ and ‘p0’ in the console.
Microtouch Simulator
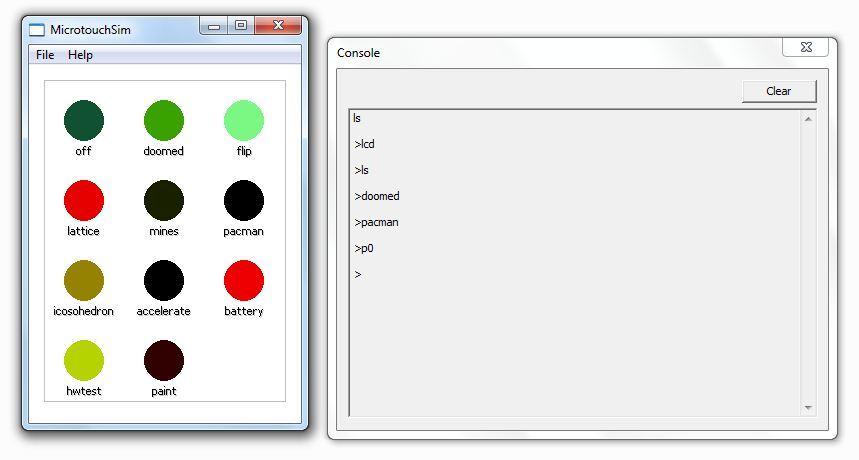
A Win32 based simulator for developing Microtouch applications without the actual hardware. Simulation is pixel accurate and includes a console window that emulates usb serial stdio. The accelerometer is emulated by a series sine waves of varing period, touch pressure is selected with keys ‘1’ thru ‘9’ CPU performance is not accurately emulated.

Rossum, you’re a god.
I want one with an LPC1114!
awesome! 🙂 I’m still trying to create my own microtouch with cortex m3. And now these tools will help me even more , thanks
The one sold by Adafruit has any Gpio? I was thinking of connecting it with an audio encoder/decoder to make a mp4 player…
@badjinn No, this has no pins available.
Adafruit, during their Ask an engineer ‘livecast’ mentioned that other products are in the work. You can see it at : http://www.adafruit.com/index.php?main_page=chat
@Boyko great, could you post it online when you’re done. Promises to be interesting.
In your original post you mentioned “USB mouse or keyboard HID support”. does it mean that microtouch has an USB client able to emulate hid?
Im working on exansive hid hardware to display/select music tracks. If i can do the same with microtouch, it should be awsome!
Thanks man!
This is brilliant, exactly what I needed for my next project, thank you! I’ll be ordering one shortly.
@Tony Right now the microtouch usb driver is serial only but mass storage/mouse/keyboard/hid will be along soon.
That seems simple solution to a problem that looks quite complicated.
Mobile Site Builder Creator With Template
Firstly, great project! Secondly, just letting you know, I hacked together a GPIO expansion board that utilizes the MicroSD card slot, some SPI code, and an attiny2313 to provide 10 pins of GPIO. I published this project to my page with all associated design files. I figure you have something better up and more elegant your sleeve, but while you were developing it, I would hack together a solution.
Ok. That is fabulous. How did you get a pcb turned so quickly? Folks check out http://hjohnson.posterous.com/microgpio-a-general-purpose-inout-expander-fo ; absolutely delightful.
Well, to be honest… I didn’t. The current board seen in the video is a microsd sniffer board from sparkfun. I have board files ready to go, but at $60+ a pop (tooling, one-board runs, etc) I wanted to make sure it worked first. Probably going to order a run tomorrow, though, I’ll let you know how it works out. Thanks for the compliments, it’s an honor.
If your not in a hurry, I would recommend http://dorkbotpdx.org/wiki/pcb_order. I ordered twice, very competitive price and good quality! The other good thing is that it helps supporting other hardware hacks projects!
Thanks for the recommendation, Michel. I’ve seen their name floating around, and will definitely keep them in mind for future projects, but for this one there is a special requirement that the board be
That seems very simple and off course very elaborated by author.
Android Application Development
I’m currently designing with orcad a board with lpc1343 which have nice pads for spi extensions. My smallest tracks are 10mills(in Bulgaria is kind of not cheap). And my code is in C (with some c++ parts ,10s from rossum :))
That looks fantastic! Would there be any way to get it connected to the internet/display webcam images?